SimpleStats gives you real-time visitor data, heatmaps, and session replays on any website. This guide walks you through creating your account, installing the tracker on your site, and confirming your first data.
Step 1: Sign up for a SimpleStats account
- Go to app.simplestats.com/register.
- Enter your email and choose a password.
- After signup, go to your dashboard to add your first website.
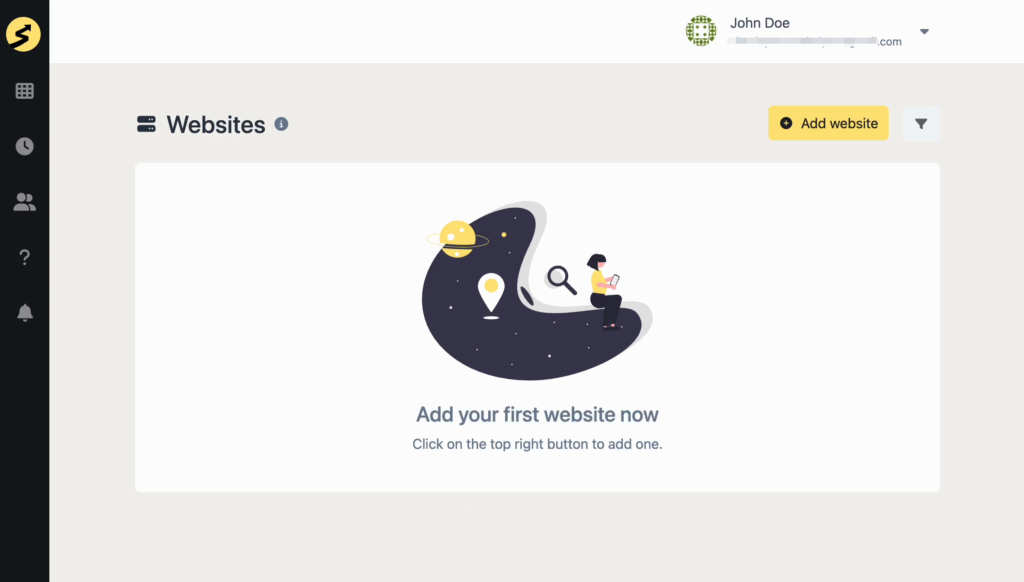
Step 2: Add your website in the app
- From your dashboard, click Add Website.
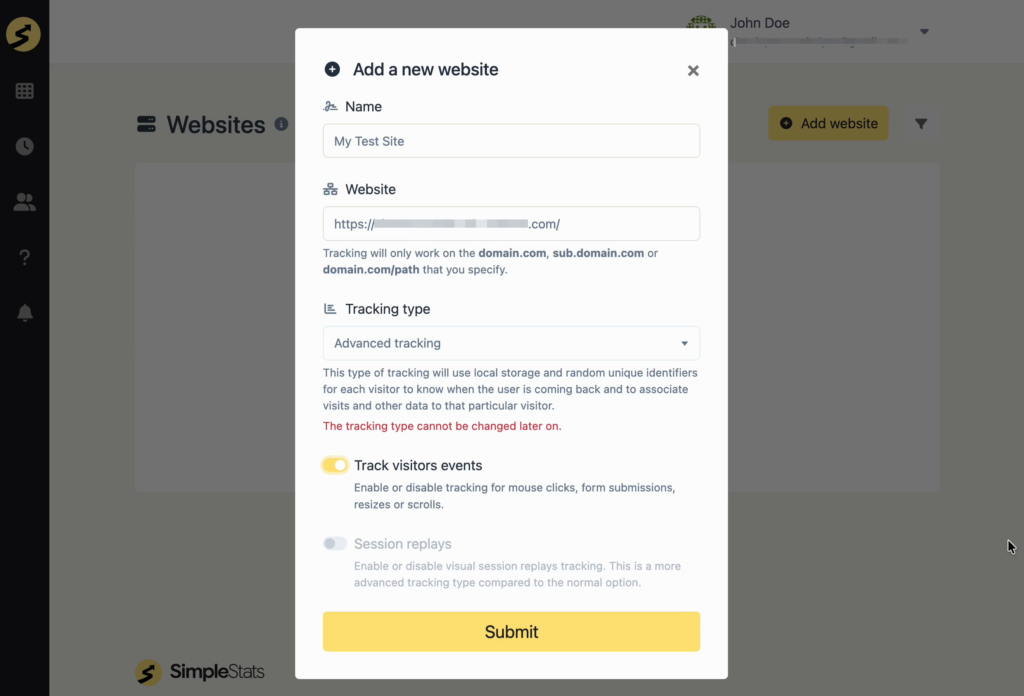
- Enter your website’s URL.
- Pick a tracking mode:
- Advanced — uses cookies and local storage to identify repeat visitors. Unlocks heatmaps, session replays, and returning-visitor insight. Choose this if you want the full behavioral picture.
- Lightweight — cookie-free and privacy-friendly (GDPR/CCPA-aligned by default). Tracks pageviews and goal conversions only, with no repeat-visitor identity. Choose this if simplicity, privacy, or minimal cookie disclosure matters more than the deeper insights.
- Click Save. SimpleStats generates a tracking snippet with your unique pixel token.
Your tracking mode is set per-website when you add it and can’t be changed later, so pick the one that fits how you want to measure this site.
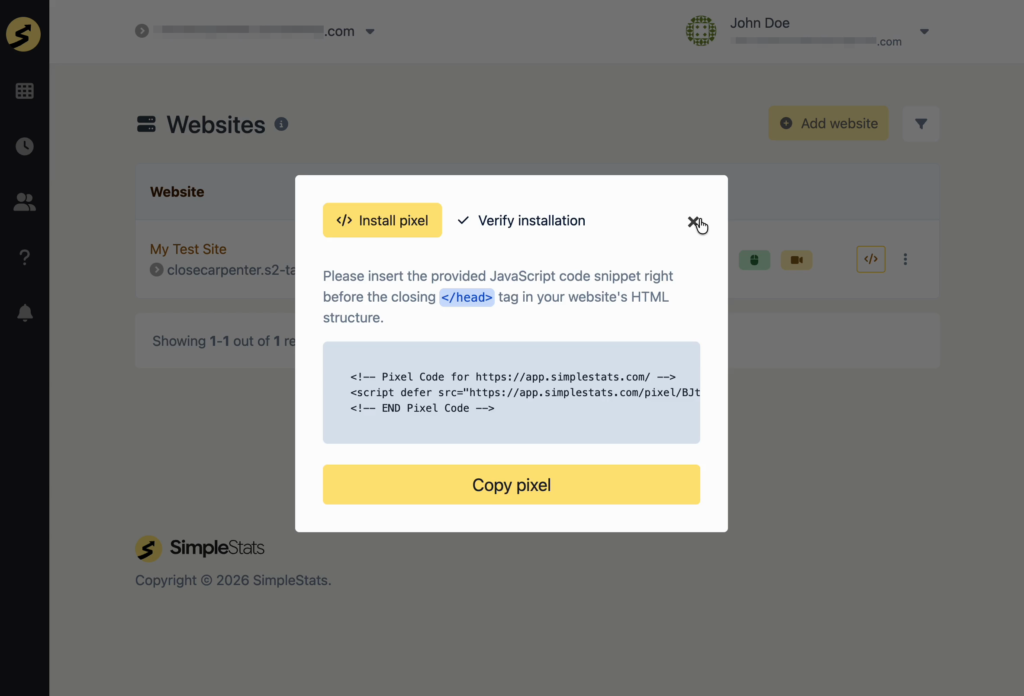
Step 3: Copy your tracking code
You’ll see a small <script> snippet with your unique pixel token, something like:
<script async src="https://app.simplestats.com/pixel/[YourToken]"></script>Copy the entire snippet.
Step 4: Paste the snippet into your site
Add the snippet just before the closing </head> tag in your site’s HTML. How you do this depends on your platform:
- Shopify: In your Shopify admin, go to Online Store » Themes, open the … menu on your active theme, and choose Edit code. Open
theme.liquidand paste the snippet just before</head>. Save. - Squarespace: In your Squarespace admin, go to Settings » Advanced » Code Injection. Paste the snippet into the Header field. Save.
- Custom-built site: Paste the snippet into your site’s HTML template, just before the closing
</head>tag. Deploy the change.
Step 5: Verify the pixel is firing
To confirm the tracker is installed:
- Open your website in a new tab.
- Right-click on the page and choose View Page Source (or press Ctrl+U on Windows / Cmd+Option+U on Mac).
- Use Ctrl+F / Cmd+F to search the source for
/pixel/.
You should see the snippet you pasted. If it’s there, tracking is live.
Step 6: Watch your first data land
Return to your SimpleStats dashboard and refresh. You should see your visit appear within seconds.
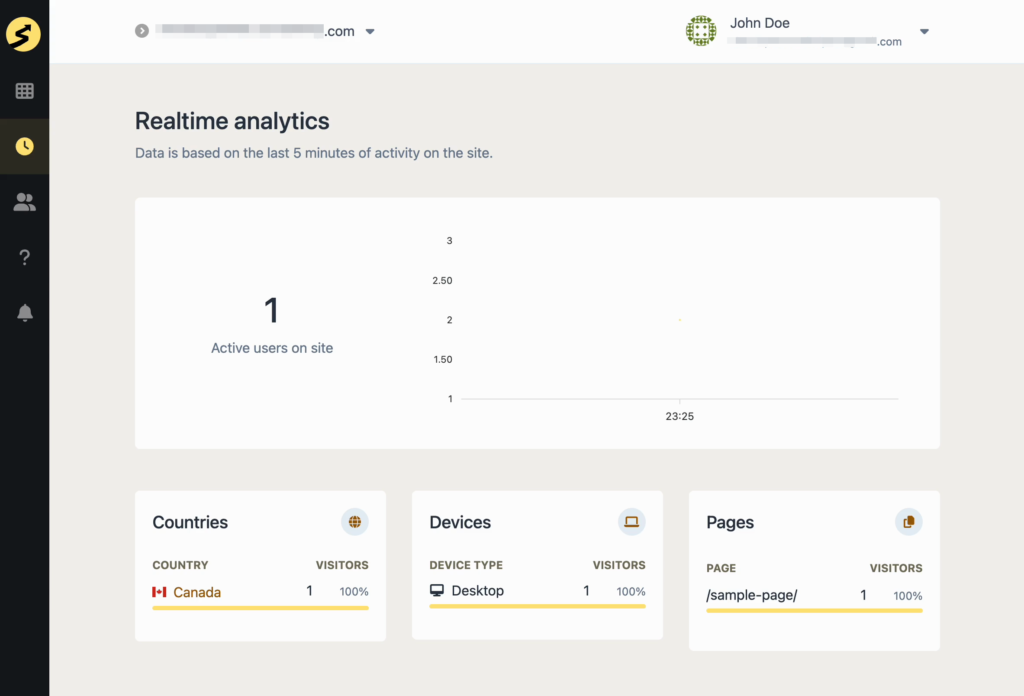
From here, you can:
- Watch the real-time view to see visitors as they arrive on your site
- Explore heatmaps to see where visitors click and scroll on each page
- Review session replays to see how individual visitors interact with your site
What’s next
- Using WordPress? Install the plugin instead of the pixel: How to Connect Your WordPress Site to SimpleStats.
- Need help?